peanut butter quinoa banana bread

2.26.2017


I think sometimes when people think of banana bread - they get this visions of a dense banana loaf with nuts. While that isn't a terrible thing by any standard, it's always nice to try something different. Let's give banana bread a refresh. Maybe it'll be the new scone? Probably not.

I was home sick for a few days this week - and do mean the literal definition of a few. I was home for three days with some unfriendly rollercoaster of a cold. Started with a fever, then no voice, then a cough, then a scratchy throat. Super great. But the entire time, I was watching a pair of bananas get darker and darker on the window sill. By the time I got around to actually using them on Saturday night, I was actually worried they might be too ripe. But they weren't - and now we have some delicious banana bread.

I did some googling last week from the couch for different banana bread varieties and came upon a few that could be good in the future:
  • black bottomed banana bread
  • brown butter banana bread with ginger
  • buttermilk banana bread
  • chia seed & citrus banana bread
  • strawberry banana bread
I ended up combining a few for this new version of peanut butter quinoa banana bread. While I knew that I would like the combo, I did run it by my sister for a second vote and she was on board. For some reason, this loaf comes out very light and airy. Almost a bit more of a muffin consistency than a loaf - which is fine with me.
Here's how it goes.
  1. Preheat oven to 375 F and pull out whatever pans you'd like to use. This recipe will make loaf pans easily.
  2. Combine the bananas, egg, and sugar in the bowl of your stand mixer. Once well combined, then you can add in the quinoa, butter, and peanut butter. 
  3. In a separate bowl, mix together your dry ingredients (flour, baking soda, baking powder) and then add to the wet ingredients in batches. 
  4. Once your batter is combined, then you can divide it evenly into your lightly greased pans. 
  5. Bake for approx. 30 minutes in the oven. Time can vary depending on pan size - so just keep an eye on it.
Shopping List
3 ripe bananas
1 egg
3/4 cup of sugar
3 tablespoons of quinoa
2 tsp melted butter
1/2 cup creamy peanut butter
2 cups flour
1 tsp baking powder
1 tsp baking soda

cauliflower asparagus chowder

2.20.2017


One of the best parts about living in the North End was being close to Haymarket. While the produce was not always amazing, being able to buy bargain priced vegetables was amazing - especially for soup. Appearance does not matter when you are putting blending that right up. Soup tends to be a really affordable meal in general - especially at Haymarket prices.

So when I saw cauliflower was on sale last week, I jumped at the chance to buy it. I was used to paying $1 ... and real grocery store pricing is around $3.50. It might sound crazy to be excited over saving 75 cents but that's almost equal to one blueberry donut. And I love blueberry donuts.

I was originally intending on making this cauliflower red pepper chowder from Food52 - but realized the expiration date for my asparagus was approaching faster. So asparagus cauliflower chowder it is! My all-time favorite cauliflower soup kicks off by heavily roasting the cauliflower to give it some amazing flavor. This soup takes a pretty different approach - no roasting. As a result, I was pretty worried that it would be a bit bland however, I was totally wrong. The soup has some really great chowder type flavors. The asparagus is pretty subtle too because I only used half a bunch left.
Here's how it goes:
  1. In a pot over medium high heat, sauté the onion and garlic with olive oil for a few minutes. Typical soup stuff.
  2. Add in the cauliflower, asparagus, potato, chicken stock, bay leaf, coriander, and cumin. Stir until well blended. Cover and let boil for about 15 minutes or until the potato is significantly softened.
  3. Add the milk. Carefully transfer the soup to the blender - and puree in batches. Don't forget to remove the bay leaf. My blender is big enough that I could have done this all at once - but just be patient. This soup is pretty thick so you'll potentially need to add some water here which is fine. I needed to add about 1/2 cup but could have gone up to 3/4 cup without issue. Just add as much as needed to get your desired consistency.
  4. Serve with shaved parmesan - and maybe some remaining asparagus if you feel so inclined.
Shopping List
2 cups cauliflower (approx. 1/2 head)
1/2 - 1 bunch asparagus, chopped
1 small onion, sliced
2 cloves garlic, chopped
1 yukon gold potato, chopped
3 cups chicken stock
1 bay leaf
1/4 tsp coriander
1/4 tsp cumin
1/2 cup milk or cream
1/2 water
parmesan to taste

snowy february

2.19.2017


I remember riding the train home one January night and seeing this tweet from my favorite weather man suggesting that February could be a very snowy month. Shortly after that it feels like it started snowing and barely stopped. It wasn't quite like the winter of 2015 - but for the past two weeks it feels like I've shoveled the driveway every other day. In the beginning, I was enthusiastic about it - and I actually still am 30 inches or so later. The first storm was fun. Then the second storm came, and I we got to work from home - which automatically made that shoveling also fun. But somewhere around the 5th snowy morning, it became less cool. Like, how is it possible I need to shovel 5 more inches of snow?

The primarily problem was that I had no idea how to strategically approach shoveling. Thankfully, I've been able to really refine my strategy. When it was a light fluffy 5 inches, you don't need a plan. You just shovel all whilly nilly and nothing matters. But, the morning after the blizzard ended I shoveled for an hour - and felt like I was making no progress ... because I was not.

Around minute thirty, I started to try and figure out how many shovels wide my car was to minimize the shoveling but it was a fruitless effort. I had essentially shoveled a walking path. At minute seventy, I googled "buy a snowblower". I'll absolutely still be buying a snowblower next Winter because I know for a fact my new strategy is null and void next Winter. Bye square driveway, hello long rectangle driveway.

The absolute upside of shoveling is that it meant all the woods were snowy - and that made them even more beautiful. Each weekend I've been pulling on my Bean boots and heading into a new trail. This probably necessitates another "outside > inside" post but for now, I'll let it be just snow.

red velvet morning buns

2.15.2017

I've had a range of "Valentine's Day" experiences in my life. There was the elementary school obligatory valentine's cards for everyone. The classic college boyfriend (who lasted for two weeks) who gave me roses. The time I was dating someone new I cared about... who didn't want to celebrate because a combination of "work" and "interest". And oddly enough in 2015, I went on a first date ... on Valentine's Day because honestly hadn't realized the day when I suggested it. But my favorite Valentines have been with my friends and family - and perhaps my sister. 

Valentine's Day to me is celebrating with friends. It's not a romantic holiday - it's a friends and family holiday. While I don't think I ever/need want to receive roses on this day, I do love seeing all the guys on the train carrying them home. It's like a little bit of vulnerability on display.

Whether it be Downton Abbey or the finale of Survivor, I've always loved cooking for an occasion. I like to take inspiration from the event and see what that turns into. Valentine's Day has been a little different. It's been mainly cookies and sweets (chocolate covered pretzels). I guess I never wrote up the recipe for beet gnocchi but that was a good one. Bummer. However on the commute home, this idea came to me. Red velvet morning buns.

Largely this is the same recipe as my previous round of Morning Buns in 2013 - but with a few modifications for ingredients. I swapped buttermilk for sour cream because I was not going to the store and then added in the flavoring for red velvet. I like to think they look like red roses <3 which I obviously announced as I delivered them like cupid to my family pre-sunrise hours yesterday.

While these babes are phenomenal right out of the oven, they are also good say... on the commuter rail with your sister in the morning... or for dinner again that night watching New Girl ... or maybe even for breakfast the next day. They stay fresh for quite awhile and will probably last you just about the same amount of time real roses would.
  1. In a small bowl, mix together yeast and warm water; set aside.
  2. In the bowl of an electric mixer fitted with a paddle attachment, cream together butter and sugar. Add egg yolks, one at a time, mixing well after each addition. The batter will become this gorgeous shade of yellow. 
  3. Add vinegar and vanilla. Mix to combine. Then, add in the buttermilk. Then mix again. Then add the yeast mixture. Mix again. Then add in the cocoa powder and red food coloring.
  4. In a large bowl, whisk together both flours and salt. Add to mixer and mix on low until well combined and dough begins to pull away from the sides of the bowl and just begins to form a ball. If you aren't satisfied with the color of your dough, feel free to add more red coloring around this point. I might not have added the full amount the recipe called for - just use your judgement a bit.
  5. On a lightly floured board, knead dough until smooth, about 5 minutes. Lightly flour the bottom of a large glass bowl; place dough in bowl and cover tightly with plastic wrap. Then try to exercise patience and wait 3-4 hours. 
  6. At this point, you could refrigerate your dough and finish the next morning. Just cover the bowl with saran wrap first. If you choose to refrigerate your dough, let it sit on the counter for about an hour to come closer to room temperature before you try to roll it out. Cool dough is easier to work with for sure, but fresh from the fridge dough is not. 
  7. Grease one 12-cup muffin tin and set aside. In medium bowl, combine melted butter, sugar, cinnamon, and mix until well blended. Set aside.
  8. Turn dough out onto a lightly floured work surface and roll into an 18-by-10-inch rectangle. Spread the butter mixture liberally over the entire dough.
  9. Beginning with the long side facing you, tightly roll dough away from you into a log; pinch edge of dough to seal. Cut dough crosswise into 1 1/2-inch pieces. Place each cross-sectional piece into prepared muffin cup.
  10. Bake at 350 F for 15-20 minutes.
  11. Remove from oven and pull the buns from the pan to cool a bit. In the meantime, melt the remaining 2-3 tablespoons butter in a small saucepan over medium-low heat. Remove buns from muffin tins. Brush liberally with melted butter and gently roll in a bowl of cinnamon-sugar mixture. 
Shopping List
Dough
2 packages active dry yeast (1 tablespoon plus 2 teaspoons)
1/4 cup warm water (100 to 110 degrees)
3/4 cup (1 1/2 sticks) butter, at room temperature
1/4 cup sugar
2 large egg yolks
1 teaspoon white vinegar
1/2 teaspoon pure vanilla extract
1/3 cup buttermilk
2 2/3 cups flour, plus more for work surface
2 tablespoon cocoa powder
1 tablespoon red food coloring

Bun & The Rest
1/2 stick butter
1 cup sugar
2 t cinnamon

Jerk chicken with mango avocado salsa

2.13.2017


Eating healthy? So complex. I've never really watched what I ate all that much because I've always been just active enough that it hasn't been critical. Yes, it's always advisable to not eat chicken fingers every Friday night but when I was walking 5 miles a day to and from work... I could do what I want. 

Now, I commute 3 hours a day and I'm over 30. Things are different. I have zero interest in going whole hog on a restrictive diet / detox ... because I will always love cheese, carbs, gluten and sugar. But, that's where recipes like this are a great find. It's extremely tasty and has absolutely zero added salt or cheese. And there is no bread in sight. To be honest, I did have some cookie dough after dinner but baby steps.

Initially I was a little put off by the fact I needed a food processor - but that is what makes this recipe so easily. You literally put everything in there, blend it, then put it on the chicken. That's it. I'll absolutely be looking for other recipes like this in the future. I'm not sure how well the salsa will keep because of the avocado but time will tell.
  1. In a high powered blender or food processor, combine all of the marinade ingredients and process until fully combined and smooth.
  2. Add the chicken and the marinade to the a large ziplock bag. Massage the bag to get the marinade covering all the chicken. Then toss it in the fridge for between 30 minutes - 2 hours.
  3. Pre-heat the oven to 400 degrees. Then place your chicken on a baking sheet or in a baking dish. Bake for about 25-30 minutes depending on the size of your chicken breasts. With about 3-5 minutes left, bring the chicken closer to the heat to get the top a little crispy.
  4. Make your mango salsa by combining all the ingredients in a medium bowl.
  5. Plate with rice, sliced chicken and the mango salsa! 
Shopping List
4 large boneless skinless chicken breasts
marinade
3 tablespoons melted coconut oil
3 green onions, chopped
3 garlic cloves, crushed
1 tablespoon freshly minced ginger
1 jalapeno
1 tsp dried thyme
1/2 teaspoon cinnamon
1/4 teaspoon ground cloves
3/4 teaspoon ground nutmeg
juice from 1 lime
salt and pepper

mango salsa2 large mangos, peeled pitted and diced
2 avocados, diced and pitted
1/4 cup fresh cilantro, finely chopped
juice from 2 limes
2 tablespoons chopped jalapeno pepper

2016 tomato recap

2.12.2017

I have been meaning to get this post out pretty much since last October - and if we are being really honest maybe even August. Peak tomato season. But, here we are in February and I'm beginning to think about the garden for this year.

When I would talk to people about my garden last year, it probably sounded like I was talking about children. I couldn't really pick favorites. Everything was special in its own way. In the interest of helping other people pick tomatoes, I'm going to describe what I grew and then rate it for a few qualities. Sound good? Ok. As a summary, I grew most of the fruit from seed and bought two varieties from a local organic farm (Holly Hill Farm). The seeds were just from Burpee - so nothing crazy!

Black Truffle // Overall = A+
Unique = A / Production = A
Small-medium shape. Perfect size for seasonal sliced tomato salads. Grew from Burpee seed [link].

Tye Dye // Overall = A
Unique = A / Production = A
Medium shape. The only thing that really held back my love of this one was that it is just a bigger fruit. Incredibly productive. I had so much left on the vine at the end of the year in November. Grew from Burpee seed [link].

Red Zebra // Overall = B+
Unique = B- / Production = A
Small-ish shape, good for everything. If you want to just have a basic tomato, that is a good size ... this can be your winner. Nothing incredible special to say. It's the "good to have on hand" tomato variety. The Burpee images had a beautiful zebra print that I didn't get in my plants - probably due to some cross pollination. Grew from Burpee seed [link].

Super Sweet 100 Cherry // Overall = A
Unique = B / Production = A+
There was nothing incredibly unique about this variety except perhaps how the vines grew. They were perfect for just cutting and tossing on the grill. Grew from Burpee seed [link].

Garden Peach // Overall = B
Unique = A+ / Production = A
Small shape, great for slicing, mellow flavor, peach-like skin. So this tomato is one where the grades just do not average out well. I picked up this variety at Holly Hill Farm before planting this year to give it a shot - and it was absolutely worth it. It puts out a bunch of fruit and was definitely a good conversation starter. I would completely recommend other people grow this variety, but only 1 plant and maybe not every year. [Burpee seed link]

Cherokee Purple // Overall = B
Unique = B+ / Production = C
Very large fruit with that traditional heirloom shape. Some of the fruits were so big they took up the palm of my hand. Much more productive during the earlier part of the tomato season but faded off earlier than the other varieties. Was not nearly as productive as the other varieties as well. Still recommend planting this one because it's a total showstopper. [Burpee seed link]
I specifically tried to pick tomatoes that would look different than what you could get at the grocery store - or a local farmstand. The result was some really beautiful (I'm biased) meals. I got pretty creative with what to do with all the tomatoes. There was a lot of sauce, some roasted with fish, roasted with gnocchi, jam, and a million caprese style salads. As of now the plan is to try almost 75% new varieties this year, so we'll see what happens.
 
[top] produce haul in late fall.
[Group of 4] tie dye, black truffle, cherry, garden peach
[Varieties section] 1 - cherry, 2 - garden peach, 3 - purple cherokee, 4 - red zebra, 5 - tie dye, 6 - black truffle, 7 - group shot showing different shapes 
[Recipes section] 1 - tie dye, 2- roasted with gnocchi, 3 - red zebra, 4 - black truffle, 5 - tomato jam, 6 - roasted tomato sauce, 7 - tie dye and black tuffle with carrot chimichuri, 8 - black truffle and red zebra, 9 - roasted cod with tomatoes

chocolate almond banana bread

2.11.2017


We've had a couple snow days this week - and apparently in the coming week too. Snow days mean many things like cozy clothes and binge marathons on tv. But if it's a work day, you don't get to binge tv ... and need to compensate with other things. I chose to compensate with this banana bread. I have no regrets. It's seriously so good.

To be fair, I got the inspiration for banana bread from my friend Rachel who posted a snap of their loaf. It seemed like such a great idea and I happened to have two perfect bananas ready for use. I've been getting a lot of inspiration from Food52 recently - so I found this original recipe there. The original recipe calls for "almond paste" which I absolutely didn't have in the middle of a blizzard. Allegedly you can make a substitute by pulsing almond slivers and sugar together - that seemed like another dirty dish to do ... so I just tossed in some slivered almonds.

This loaf is something else. Banana bread is always good - but perhaps never feels "next level". This chocolate almond version is absolutely "next level" but at the same time very approachable and not far from the traditional version. The crust of the bread is pretty much perfect. It's thin and sweet and amazing when it is warm. I'd absolutely recommend this to anyone who has a bit of sweet tooth. Plus, it's completely kid friendly.
Here's how it goes.
  1. Preheat your oven to 350°F. Grease your two 9" x 5" loaf pans.
  2. In a large bowl, combine the flour, cocoa powder, baking soda, baking powder, salt, and espresso powder (if using). Stir in the bittersweet chocolate and slivered almonds.
  3. In the bowl of a mixer, combine the sugar, oil, eggs, and bananas until smooth. Add the vanilla extract and mix again.
  4. Add the wet ingredients to the bowl of dry ingredients and mix together until combined.
  5. Pour the batter into the pans. Bake for about 45-60 minutes (if you're using a different, smaller pan, start checking much sooner). I got distracted and never set a timer... and I didn't take any pictures either so no timestamps to help.
  6. Remove from the oven - and enjoy!
Shopping List
1 2/3 cups all-purpose flour
1/4 cup cocoa powder
1 teaspoon baking soda
1/2 teaspoon baking powder
3/4 cup chocolate chips
1/2 cup slivered almonds
1 1/4 cups sugar
1/4 cup coconut oil
2 eggs, at room temperature
2 very ripe mashed bananas
1 teaspoon vanilla extract
1/4 teaspoon espresso powder (optional, for enhanced chocolate flavor)

Ina Garten's cake


I keep calling this the "Ina cake" but it could also be called by its actual name - Devil's Food cake. But honestly, I'm always going to call it in the Ina cake because it's from Ina Garten's latest cookbook that I got for Christmas. I made this cake on a weekday for my mom's birthday. I can't take credit for the beautiful writing on the cake - that was my sister.

I remember reading about this chocolate cake recipe in some of the press for the book. Everyone was saying how complicated it was and how you needed two days to make it. Technically, Ina says you need two days because 1 day is for the cake and 1 day is for the frosting. We skipped the buttercream frosting because it seemed a bit decadent for a Tuesday night in the burbs. Also, the amount of butter was rather startling and we have several people watching their diets pretty closely.

Truth be told, I'm not really a chocolate cake person - but there is something about making it from scratch that made me more of a fan. This cake wasn't necessarily as moist as I was expecting but I would still highly recommend it. And it's not nearly as complicated as it seems. Just put all your ingredients out on the counter to start and you'll quickly make your way through them. Plus, the batter tastes amazing.


  1. Preheat the oven to 350 degrees. Grease two 9 × 2-inch round cake pans, line them with parchment paper, then grease and flour the pans. Set aside.
  2. In the bowl of an electric mixer fitted with the paddle attachment, cream the butter and sugar on medium speed for 3 minutes, until light and fluffy. On low speed, add the eggs, one at a time. Add the vanilla and beat until well mixed, scraping down the bowl with a rubber spatula.
  3. Whisk the cocoa powder and hot coffee together in a small bowl. With the mixer on low, add it into the batter.
  4. In a medium bowl, sift together the flour, baking soda, baking powder, and salt. With the mixer on low, slowly add half the flour mixture to the batter, then all the sour cream, then the remaining flour mixture, mixing each addition until combined. With a rubber spatula, fold the batter until it is well mixed.
  5. Divide the batter equally between the two prepared pans and smooth the tops. Bake for 30 to 35 minutes, until a toothpick inserted into the center comes out clean. Cool in the pans for 30 minutes, turn out onto a baking rack, and cool completely.
  6. Frost as you see fit.

Shopping List
3/4 pound (3 sticks) unsalted butter, at room temperature
2 1⁄4 cups sugar
4 extra-large eggs, at room temperature
4 teaspoons pure vanilla extract
3/4 cup unsweetened cocoa powder
3/4 cup hot brewed coffee or espresso
3 cups all-purpose flour
1 teaspoon baking soda
1 teaspoon baking powder
1 1/2 teaspoons kosher salt
1 cup sour cream

pretzel bites

2.06.2017


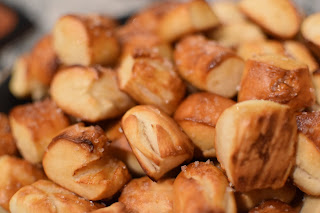
I really love Auntie Anne's pretzel bites. Like, while I never hope for a travel delay... the only upside is that I can treat myself to pretzel nuggets in South Station. There are some downsides to buying pretzel nuggets. One? It costs $4. Which isn't exactly crushing but it is when you consider its a non-healthy impulse snack. Two? It feels like they are always out of inventory during rush hour. About a month ago I decided the week had been enough and I needed pretzels. I let some girl cut in front of me while I grabbed my wallet... and she got the last salted nuggets. Devastated.

So, when I began thinking about what to make for a Superbowl snack... my heart pretty quickly went to pretzel bites. I had previously made these about 4 years ago and felt like they went fine. I didn't switch anything up here but for some reason they turned out even better. I honestly think the secrets to killer home pretzels are:
  • knead the dough // use a stand mixer and really let it go for 9 minutes. When it is done, you can see the consistency of the dough change. Be patient.
  • let it rise. for real. // It is winter time - so the house is not as hot as it should be for rising dough. When I didn't see much change after 20 minutes, I put the bowl close to the gas fireplace and let it rise there. Jackpot. 
  • baking soda bath // do yourself a favor and really just make a bowl. It makes it so much easier to just drop the nuggets in and get a good bath instead of a brushing.
  • nugget size // it's just better. I think the bite size nature of these enhanced everything. You got buttery, carby, salty flavor all at once.
  • crystal salt // It's worth buying crystal salt for $2.50. Don't try to use kosher salt. It just won't be the same.
When I showed up to the party with these pretzels, they were an immediate hit. Like, I'm not sure I've ever made anything so well received in the history of this blog.

Link to the recipe from 2013

Hominy Chili

2.05.2017

 
I had never cooked with hominy until today - and I'm pretty excited to do it again soon. After New Years, I had stumbled upon a Whole 30 chili recipe that featured hominy. I had no idea what it was so I pretty immediately clicked away. Then I saw it in the grocery store and couldn't find that chili recipe ever again. Devastated. I gave up trying to find that unicorn of recipe and just found a replacement.

I adapted this recipe a bit but was pretty excited to use two things from my freezer: ground meat and chopped garden peppers. The original recipe has much more of a Mexican influence with some adobo flavors - but I wasn't interested in going to the store on Superbowl Sunday for one ingredient.

I really liked how this chili came out and it's pretty different that my other chilis. It's much more simple and perhaps a bit lighter. A bowl of it doesn't feel as hearty but not in a bad way. Chili is such a great winter meal but sometimes feels like a bit much. This feels just right - and I know it is only going to taste better with each passing day. That's the magic of chili. Also, I've now written "chili" eight times.

Here's how it goes.
  1. In a large pot over medium-high heat, warm 1 tablespoon oil. Brown half the ground turkey with 3/4 teaspoon salt and 1/4 teaspoon pepper, stirring occasionally until golden, 6 to 8 minutes. Stir in half the garlic and half the chili powder and sauté for another 30 seconds. Using a slotted spoon, transfer turkey to a bowl. Brown remaining turkey in same manner, transferring it to bowl with rest of turkey.
  2. Add remaining 2 tablespoons oil to pot and sauté onions, bell peppers and jalapeño peppers with remaining 1/2 teaspoon salt. Cook, stirring, until onion is translucent, about 10 minutes.
  3. Return ground turkey and any liquid in bowl to pot and add tomato purée, hominy, beans, beer, chipotles, oregano and bay leaves with 3 cups water. Simmer chili, partly covered, until it is thick enough for your taste, about 1 hour. Serve hot, garnished with sour cream, scallions, cilantro and lime wedges.
Shopping List
olive oil
1 - 1.5 pounds ground meat (pork / beef combo)
salt & pepper
6 garlic cloves, chopped
1 tablespoons chili powder
1 large Spanish onions, chopped
1.5 cups peppers, chopped
1 jalapeño peppers, to taste, seeded and chopped
1 14-ounce can tomato purée
1 15-ounce cans white hominy, drained
1 15-ounce cans pinto beans, drained
1 12-ounce bottle beer
1 teaspoon dried oregano
2 bay leaves
Sour cream, for serving
5 scallions, white and light green parts, sliced, for serving

rustic asparagus beet tart


I'd like to file this appetizer under "came out good, but lots of room for improvement". Sometimes I go back and forth about whether to write up something that has "significant opportunity" but I think in this case it is worth it. But to be clear, I made a batch of dairy-free banana orange quinoa "muffins" that I'm not writing about yet. In the ever descriptive words of my sister, they are like hard tack for sailors crossing the the Atlantic Ocean.

But the tart is in a much better shape. It needs a lot less improvement than the muffins. I found the original recipe for this tart on Food52 and made some modifications - like swapping asparagus for wilted greens. I served this tart as a "starter" for our book club meeting and followed it with with butternut squash apple soup.

Where this is a good recipe?
  • Nice and light.
  • Great base and can easily be used to swap in and out seasonal ingredients. Hello summer tomatoes and garden fresh basil.
  • Super fast and easy. The hardest part is making sure you have pastry dough on hand - which you should always buy if you see it on sale. Paying $4.99 hurts.
Where it can improve?
  • Not quite hearty enough // The cheese custard part of the tart is much more significant than the other components (beets and asparagus). I wouldn't cut down on that necessarily but maybe if you added some protein (crumbled sausage?)
  • Portion Size // Cut into smaller servings. I cut into 6 even pieces but I think that if the portions were smaller you would have felt like you were eating more veggies and less pastry. 
  • Add more veggies // End of story. Really layer in the beets more aggressively and the asparagus if you go that way.
  1. Roll the puff pastry out until you have a rough 10-inch square. Transfer the square to a parchment-lined baking sheet.
  2. Roll in the edges of the pastry about an inch on all 4 sides so that you have a pastry wall. Use a little water to seal the edges. You want to make sure that the custard doesn't leak out when poured into the "shell".
  3. Combine the egg and the goat cheese with salt, pepper and nutmeg. Slowly add the milk or cream, stiring until you have a thick but good smooth consistency. It should be no thinner than pancake batter.
  4. Pour the custard into the pastry shell, then lay the beets on top, being careful not to overflow the pastry shell.
  5. Chop off the tops of the asparagus first and then use a vegetable peeler to get thin slices of asparagus. You'll probably want to use about 6 asparagus spears at a minimum - I would recommend going a little bit heavier than I did. Alternatively, just chop the asparagus into like 1 inch bits and put them on the tart. I'll probably go this route next time I make this.
  6. Bake at 400 until the pastry is golden, the custard is set, and the top is just a little brown.
Shopping List
1 can of sliced beets
1/2 package of frozen puff pastry, or equivalent of homemade
1 egg
1/4 to 1/2 cups whole milk or cream
3 to 5 ounces goat cheese, room temperature
Salt, pepper, and nutmeg to taste
© WHAT JEN DOES • Theme by Maira G.