harvest loaf with maple butter

10.15.2019

Technically this is a pumpkin loaf... but I don't want to call it that.

I'm not a huge pumpkin flavor person. I've never been one for a pumpkin spice latte. Pumpkin pie? No thanks. I do get on board with other seasonal flavors. Gingerbread, peppermint, etc. It feels like there are others but I can't think of them right now.

I came across this recipe on Twitter and it won me over. I think because it was not screaming "I'm a pumpkin loaf". The most amazing part of it was that I only needed two things to make the whole recipe happen. The end result is incredibly delicious. The ginger cuts the traditional pumpkin flavor into an unexpected harvest flavor. Does that make sense? Maybe not. You'll just have to make the loaf and see.

I was feeling particularly ambitious on this occasion so I decided to make my own butter as well. While that might sound aggressive, homemade butter is very easy. It only requires patience, a stand mixer and heavy cream. Here is a link to the recipe that I have used. I flavored this batch with maple syrup and sea salt.

Key tip? Do not skip the pumpkin seeds and sugar on the top. It gives a lovely little crunch.
  1. Preheat oven to 325°. Lightly coat a 9x5" loaf pan (or two smaller pans) with nonstick spray. Line bottom of pan with parchment, leaving a generous overhang on both long sides.
  2. Whisk flour, cinnamon, kosher salt, baking powder, baking soda, nutmeg, and cloves in a medium bowl.
  3. Whisk eggs, pumpkin purée, ginger, and 1½ cups sugar in a large bowl. Stream in oil, whisking constantly until mixture is homogeneous. Gently fold half of dry ingredients into egg mixture until no dry spots remain. Repeat with remaining dry ingredients.
  4. Transfer batter to prepared pan. Scatter pumpkin seeds over batter. Sprinkle seeds with remaining 1 Tbsp. sugar. 
  5. Bake bread, rotating pan once halfway through, until a tester inserted into the center comes out clean, 80–90 minutes for larger pan or 50-65 minutes for two smaller pans.
  6. Let cool slightly, then run a knife or small offset spatula around pan to help loosen bread. Using overhang, transfer bread to a wire rack and let cool.
Shopping List
loaf
Nonstick vegetable oil spray
2½ cups all-purpose flour
2 tsp. ground cinnamon
2 tsp. kosher salt
1 tsp. baking powder
½ tsp. baking soda
½ tsp. freshly grated nutmeg
⅛ tsp. ground cloves
2 large eggs
1 15-oz. can pumpkin purée
1 Tbsp. plus 1 tsp finely grated ginger (from about one 3" piece fresh ginger)
1½ cups plus 1 Tbsp. sugar
1 cup extra-virgin olive oil
½ cup raw pumpkin seeds

butter1 cup heavy cream
1/4 cup maple syrup
sea salt

turkish-style beef and eggplant stew

This weekend I very intentionally flipped through several of my recipe books to find a new recipe to make. After a couple books, I found things that I would want to make some day but not right now. While I don't have a million cookbooks, I certainly have enough that it would be great to find some inspiration from them in the kitchen as opposed to just for decor.
I ended up finding this recipe in a fall edition of Real Simple magazine. It was not lying when it said 20 minute prep time. I barely did any work here. In fact I did more work taking pictures of the meal cooking over 6 hours than I had done preparing it.

In short, I highly recommend this for people who are busy or just want to be surprised by a tasty meal on their counter 6-8 hours later. I will say it has certain "intensity" or "heat" to it that might not be super suitable to kids? I'm not sure what kids eat. I'm not a person that loves hot flavoring but you could just cut back on the crushed red pepper.

Bonus for this meal? The eggplant came from my garden and the peppers came from my Dad's. I love when a meal that isn't a caprese salad can be made from our gardens. The eggplant variety is called "patio baby eggplant" which is why they are so tiny. I love them for that - perfect for recipes and sharing with friends and neighbors.
  1. Combine vinegar, tomato paste, cumin, Aleppo, salt, black pepper, and ¾ cup water in cooker. 
  2. Add beef, eggplants, bell peppers, and onion; stir to combine. 
  3. Cover and cook until meat is very tender, 6 to 7 hours on low or 4 ½ to 5 hours on high. 
  4. Serve stew over couscous, garnished with oregano.
Shopping List
⅓ cup red wine vinegar
3 tablespoons tomato paste
1 tablespoon ground cumin
1½ teaspoons crushed red pepper
1 tablespoon kosher salt
½ teaspoon freshly ground black pepper
3 pounds boneless beef chuck roast, trimmed and cut into 2-in. pieces
3 small Italian eggplants (1¾ lb.), sliced into ½-in. rounds
3 medium-size red bell peppers (1½ lb.), seeded and sliced
1 large yellow onion, chopped
Cooked couscous and fresh oregano leaves, for serving

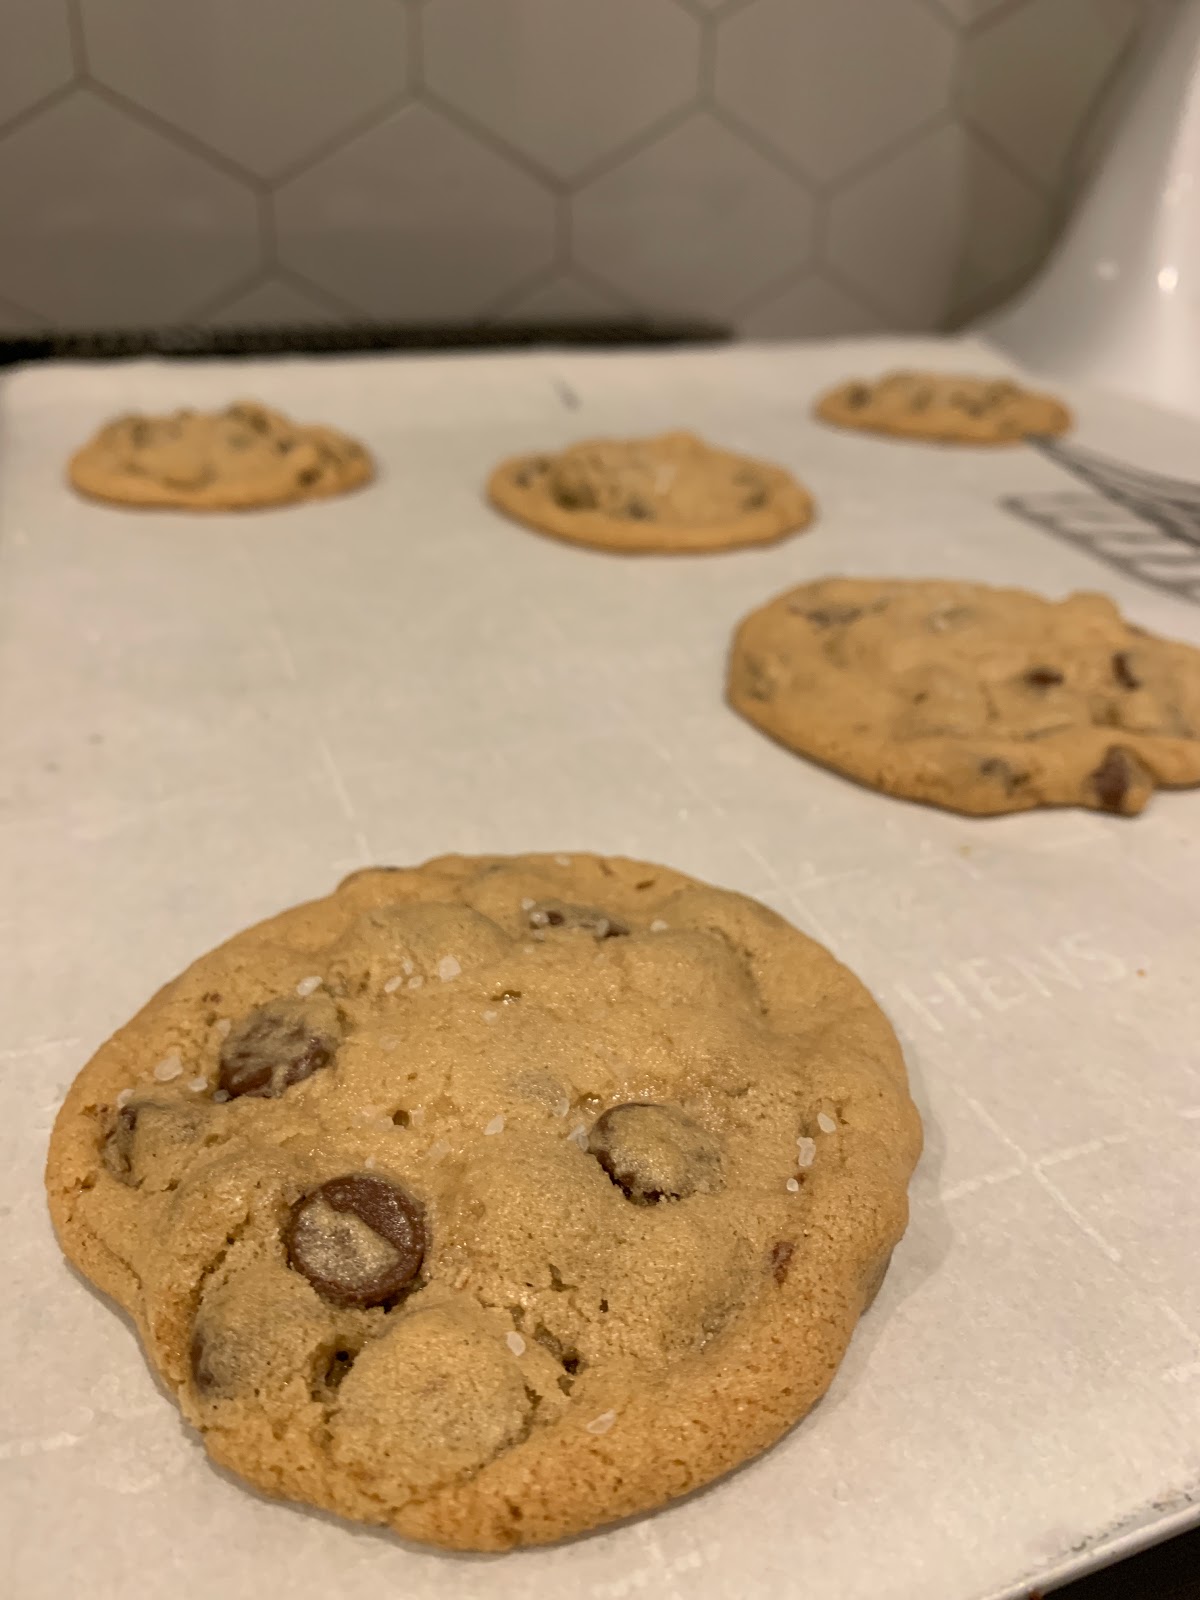
amazing chocolate chip cookies

10.09.2019

Does actually sifting flour make a difference in cookies? Maybe. 

All I know is these cookies are delicious. They are beyond simple. Just a chocolate chip cookie. I refuse to compare the recipe to another one because I need to believe the recipe is a little bit of magic.

In full disclosure, this recipe is from The Gilded Hotel in Newport. I stayed there earlier in the Fall for a birthday weekend. The place was super cute but they also served chocolate chip cookies nearly on command. There were cookies at 4pm when we were getting ready for dinner.... and again at 1:30 AM when we got home for the night.

Did I eat a chocolate chip cookie in bed? No. I ate two.

When we were checking out the next morning, I casually asked if they ever gave out the recipe. Without even a second thought, they gave it up. I love when people share like that. Why keep all the good stuff for yourself? I'm still busy telling everyone how amazing the all the food was at this hotel.

One night this week I finally got around to making these cookies for myself. I made the whole batch but only baked 6 cookies - thankfully. Were they the same as The Gilded? No. Not quite. I think they use more dough per cookie... and as a result they have a little more volume. But I did eat all the cookies I made in 1 day. And if we are being honest, I've eaten a little bit of the dough several times.
Here's how it goes.
  1. Preheat oven to 350. Line baking sheet with parchment 
  2. In a bowl, sift together flour, baking soda and salt 
  3. In mixer, combine butter, brown sugar and granulated sugar. Beat until combined. Add egg and vanilla. Add in dry ingredients bit by bit, mixing until combined. Add in chocolate chips. 
  4. Drop cookies onto baking sheet using a cookie scoop or ice cream scoop. Bake cookies until golden brown, 12-14 minutes. Top with sea salt. 
Shopping List
1 ¼ c flour
1 tsp baking soda
½ tsp salt
½ c butter, room temp
½ c packed brown sugar
6 tbsp sugar
1 egg
1 tsp vanilla
2 c semisweet chocolate chips
Sea Salt 

butterfly party

10.06.2019

This year I have inadvertently - and wonderfully - become a home to so many butterflies. It is wonderful. I am sure that I say this somewhat regularly... but I have not gotten so much joy and relaxation from something unintended recently. 

I planted these Mexican sunflowers in my garden that have grown to be maybe 8 feet tall. They are quite high. They are also a magnet for the monarch butterflies in the last month or so. One day I was out in the garden and there were so many that I could not keep count. When I tried to take a picture of it I saw more than I hadn't noticed in real life. 

Watching the butterflies provides an incredible sense of peace. In the mornings when I'm sitting on my front porch, I have seen them fly around the corner of the house and head to the garden. It's as though they are commuting to work the same way the cars are driving by. Standing in the garden they bounce from flower to flower doing their thing. I never understood the draw of a "butterfly bush" but now I do. I could sit and watch them all day long. 

The only challenge will be how to plant for them next year. I need more sunflowers than Mexican sunflowers but don't want to lose my butterfly population. Might have to get creative about my garden layout. A perfect problem to try and solve during a snowstorm in January.


best quiche ever

10.01.2019

A couple weeks back I had the best quiche ever. It made me realize how lazy and terrible my quiches had been to date. I just would mix eggs and milk and call it a day. BUT, this new quiche was so perfect. I legit could not stop talking about it at the brunch.

I came home with the motivation to drastically improve my quiche. I knew right away that the answer would not be low calorie. I was adding way too much egg and needed to swap that with some heavy cream. I did some quick googling and came upon a recipe literally titled "Best Quiche Recipe". My suspicions were true.... more heavy cream and whole milk.

This recipe did help me realize two things. One? I'm not sure where my pie plate is. Two? I forgot that I threw out my pastry brush last Spring.

What did I learn this time?

  • Springform pan // Wonderful swap. I love how deep it makes the quiche and the overall structure. It does however essentially double the cooking time.
  • I never use pie weights // Not once in my life have I par baked a pie crust to the specifications in a recipe. I've lived to tell the tale but I do wonder how much better my crusts would be if I did this.
  • Custard // This is crucial. I am not sure what the difference is between "eggs + milk" and "custard" but there is absolutely a difference. So follow the recipe and you'll get a wonderfully creamy custard that does not taste "eggy".
  • Egg white seal // This seems real important. I feel like it helped to maintain the structure of the quiche and prevent leaks from happening.
  • Store-bought crust // Sometimes I like to make my own crust and then sometimes it is just easier to buy it. This isn't the worst thing in the world, it is just the easiest.

 
Here's how it goes.
  1. Pan Prep // Unroll your pre-made crust. Use your fingers to press and even out the crust into the pan. Ensure the bottom corners are tightly pressed against the pan. Stick in the freezer for at least 15 minutes or up to 2 days.
  2. Par-bake the crust // Heat the oven to 400 degrees. Line the frozen crust with a square of parchment, fill with dried beans (or another pie weight), then set on a sheet pan. Bake on the lower rack for about 40 minutes, rotating halfway through, until the crust is starting to brown along the edges and the bottom no longer looks raw and doughy. 
  3. While the crust is baking, use a fork to whisk the egg white with a pinch of salt until it’s very loose. When the crust is done, remove the parchment and beans and prick the bottom and sides of the crust a few times with a fork. Brush the inside of the crust with the salted egg white, then return to the oven to bake for another minute to set.
  4. Remove the par-baked crust from the oven to cool, then lower the oven to 325°F and turn your attention to the custard.
  5. Make the custard: Combine the cream, milk, and flour in a bowl. Whisk until smooth. Add the eggs, egg yolk, salt, and pepper, and whisk until smooth.
  6. Fill the quiche: Sprinkle half of the cheese evenly over the bottom of the crust. Sprinkle the mix-ins on top, spreading them out as much as possible. Make sure that you can see the cheese and crust below - the custard filling needs to be able to get through. Sprinkle the remaining cheese on top. Slowly and evenly pour in the custard, taking it as high to the brim as possible. 
  7. Bake the quiche for 55 to 65 minutes, or until it no longer shimmies when shook. (If the crust starts to brown too much mid-bake, you can carefully tent it with foil.) Let cool until warm before serving.
Shopping List
1 cup heavy cream
1 cup whole milk
3 tablespoons all-purpose flour
5 large eggs
1 large egg yolk
1 3/4 teaspoons kosher salt
3/4 teaspoon freshly ground black pepper
1 to 1 1/4 cups mix-ins
1 cup grated cheese

summer salad

9.25.2019

Good news. You can make healthy food even better with two small tricks. One? Cut the vegetables into adorable shapes like half moons. Two? Make this super easy dressing and pour it all on.

Last weekend I stayed at The Gilded in Newport. The food was so amazing that since checking out I have asked for two of their recipes... and they have actually emailed them to me. At some point in the near future I will absolutely be making their chocolate chip cookies, but until then I make a version of their incredible tomato salad. 

Their tomato salad was a bit different than mine. I refused to go to more than one grocery store (TJ's doesn't have fava beans) and needed to amp it up a bit to be more filling. The real reason this salad is amazing is the dressing. It is so light and flavorful without being too much of anything. You don't feel like you are eating a bowl of cilantro. I can see myself making a dressing like this for many years to come. 

Changes I made:
- Swapped fava beans for chick peas. This was "fine" because I had the chick peas on hand, but the salad really needs something light, and crisp. Fava beans would be perfect but the chick peas meant I didn't go to another store.
- Added chicken sausage. I will put chicken sausage in just about anything. I love it. This boosted the salad to be just a touch more filling.
- No onion. Pretty much just because I was too hungry and forgot. I would do this next time if I remembered, but it was still pretty great without it.

What makes this salad so amazing? It's the combination of the herby, light dressing with the yogurt on the bottom of the dish. I was doing everything I could to scoop up that goodness and be a member of the clean plate club. Do not skip the yogurt.

Here's how it goes.
  1. Combine all the dressing ingredients. Blend together using a food processor / immersion blender / whatever you want. It is worth doing this mechanically because it really changes the texture of the dressing.
  2. Chop and prep the rest of your salad ingredients. Mix well to coat with the dressing. Let rest in the fridge for 20 minutes.
  3. Right before serving, spread a dollop of yogurt in the bottom of each dish. Lightly salt the yogurt and then top with the dressed salad
Shopping List
dressing
Approx 3 tbsp roughly chopped mint (12 g)
Approx 3 tbsp roughly chopped cilantro (12 g)
2 cloves of garlic, crushed
5 tbsp lemon juice
1/3  cup olive oil, plus extra to drizzle
¾ tsp coarsely ground black pepper

salad

1 cup garden tomatoes, halved
4-5 radishes, halved & thinly sliced (half moons)
1/2 cup limas/favas
3 mini cucumbers, peeled and chopped into cubes or half moons
1 spring onion, thinly sliced

For the love of old windows... and old friends

9.22.2019

I was in Newport for the weekend - which was lovely. 

It was such a special occasion celebrating one of my oldest friends. Although 11 years might actually not be that long, we have certainly done a whole lot of living in those 11 years. Learned a whole lot of lessons. Mostly good ones, which is nice.

The weekend was spent mostly outdoors which is my favorite place to spend time. So few pictures were taken that it is challenging to write a post about it - but I've found myself recently passing on past posts to others... and given that, any post is a good post. 

Slept At: Gilded Hotel
This place was aggressively quirky and cute with a super loud design decor. I tend to skew more towards traditional, New England looks but this was very bold - and wonderful. But the best part might be the hospitality. There was a great tea selection (I'm an old woman at heart) and peaceful little courtyard with a fountain. The homerun of it all was really the homemade chocolate chip cookies that magically showed up at the right time - even 1 am when we got home from the events. 

The next morning there was this thing called "small plate breakfast" which could be annoying - but was actually really wonderful. I've already emailed the hotel for the tomato salad recipe. It was delicious. Turns out if you put tasty food in very small plates people will love it. Even the super small diced watermelon.


Socialized At: New York Yacht Club, Harbour Court
The event was at the NYYC. From any of my research and all the signs, I know that phones are not permitted anywhere and cameras are not cool either. There is apparently a small loophole if you go outside and down the very steep hill. So that is what we did. 

I love a good house with history, plus a giant flagpole and sweeping views didn't hurt either. The passed appetizers were delightful. I absolutely consumed more than my fair share of deviled eggs and roasted golden beets. Would also like the recipe for those beets. 


Night Activities: Everywhere
One of the planning people wrote up a treasure map of sorts to keep everyone on track after the cocktail party. I honestly have no idea where we went all night mostly. All I know is that it was not too far, but far enough for my tender little feet in heels. They are highly accustomed to sneakers and Birkenstocks... not 3 inch heels on cobblestone streets. My how life has changed.
  1. Perro Salado --> adorable patio area with even cuter lights. absolutely must go here.
  2. The Fastnet --> Good amount of space plus there is darts... and the majority of the walls can be written on in chalk. Sounds fun right?
  3. Buskers --> Standard Irish pub
  4. Benjamins --> there are a lot of stairs to get to the great stuff - but there is this upper deck area that is wonderful. Go all the way to the tippy top. 

Morning Stuff: Assorted
I'm an early bird so I got in a lovely walk of the Newport streets before the actual brunch and the hotel brunch. Yes, I ate twice. The old houses are great in Newport but it is really the amazing older windows that I'm in love with. You simply cannot buy them like this anymore. 

The actual brunch was delicious. If I spent the entire last evening telling everyone about the roasted beets, I spent the morning talking about the kale and bacon quiche. It is by far the best quiche I have ever had. I have a renewed interest in figuring this out for my home life.  I do think the secret might be a lot of heavy cream. That's okay.
 

eggplant parm

9.19.2019

Woah. I had no idea that these little bitty eggplants could be so delicious. I think I have always turned away from eggplant parmesan because of the eggplant. In hindsight that is truly ridiculous because nothing can be terrible when you cover it in cheese.

When I was planning my garden this year, I really wanted to include a patio baby eggplant. The patio baby produces plants that are much smaller than traditional plants. They are ideal for growing on patios (obviously) and for people who don't need a ton of large produce (single people). I did try to grow this same variety last year but it was largely unproductive.

The plant has been bursting with little eggplants for much of the summer but I didn't get around to really using them until this week. Until now I've been forcing them on people who come for tomatoes. You want some fresh tomatoes? Take an eggplant as a bonus item.

Making eggplant parm doesn't take a lifetime but it does have more steps than I'd otherwise subscribe to on a weeknight. You have to prepare each eggplant slice, fry it, and then bake the whole thing. It's just one step too many for me but I'm glad I made it happen. This was delicious. There are probably a million eggplant parm recipes out there but this is the one I started with. Like all of my recipes, I never really follow the instructions to a T.

A few notes:
Eggplant slices // Really stick with 1/2 inch slices. Anything less than this and I think they are too floppy and won't hold the breadcrumbs that well.
Double Dip // I double breaded the eggplant slices. It was worth it. In other words, egg --> breadcrumbs --> egg --> breadcrumbs --> fry it up.
Eggplant size // Since I was using a smaller variety of eggplant, I think mine also retained less moisture. As a result, I didn't need the full hour to pull moisture out (see below for more context). I do think this step is a game changer. I can't imagine making eggplant parm and it being soggy. No thanks.
Pasta // I served this over some linguine with more tomato sauce but you can do many other things. I might eat some of the leftovers in a sandwich or perhaps over some pesto pasta. Seems a bit wild, but I feel like it would be good.

Some bonus points for this recipe? Nearly all of the ingredients came from my garden or my neighbor's. I grew the eggplant and basil. The tomato sauce was made from my tomatoes over the prior weekend. It is literally just tomatoes, no onion, garlic, etc. So pure tomato goodness. The eggs for the breading came from my Aunt's chickens next door. Only ingredients that were bought? Breadcrumbs and cheese. So incredibly satisfying - and delicious.
  1. Salt both sides of your eggplant slices and place them in a large colander in the sink. Let the liquid drain for 45 minutes to 1 hour. Brush off the excess salt when you are done so they aren't too salty!
  2. In 2 shallow dishes, add breadcrumbs to one and whisk eggs and milk in the other. Dip both sides of eggplant slice into milk/egg mixture then cover with breadcrumbs, shaking off the excess. Repeat. Place on large baking sheet and repeat until all eggplant slices have been coated.
  3. Preheat oven to 375 degrees.
  4. Heat a skillet over medium high heat and add 1 tbsp. of vegetable oil into the skillet. Once the skillet is hot, add eggplant slices at a time to the skillet and cook on both sides until golden brown, remove and set back on baking sheet. Repeat until you've pan-fried them all.
  5. In a large casserole dish, add 1 cup of tomato sauce to the bottom of the casserole dish. Add a layer of eggplant slices, then sprinkle cheese. Repeat sauce, slices, cheese layers until you don't have any left. For the very top be more generous with the shredded mozzarella and sprinkle on some bonus parmesan cheese. 
  6. Bake for 20-25 minutes, or until the cheese is bubbly and slightly crisp on top. If needed, you can pop it under the broiler to get cheese crispy.
  7. Serve hot and top with torn basil.
Shopping List
1 large eggplant, sliced into 1/2" thick slices
2 tbsp kosher salt
1 1/2 cup breadcrumbs
2 eggs
1/2 cup milk
4 tbsp vegetable oil, for lightly pan-frying
3 cups tomato sauce
2 cups mozzarella shredded
1 cup parmesan cheese
Handful of fresh basil leaves chopped
© WHAT JEN DOES • Theme by Maira G.